Failed on importing your MPG files to iPad, iPhone or some other devices for playback or to iMovie for editing? Do you want to know what caused the failure of importing MPG files? This article will help you understand what the hell is going on importing MPG files and give you some suggestions of importing MPG smoothly.
Hot Search: HandBrake Alternative for Mac | AnyDVD for Mac alternative | MakeMKV Alternative for Mac | FFmpeg Alternative | DVDFab Alternative for Mac
As a Mac user, you might need to convert MPG to MP4 on Mac (El Capitan, Yosemite, Mavericks, Mountain Lion, Lion and Snow Leopard included), because MP4 is the video format which is widely supported by Apple devices and iMovie.
Let’s figure out what the difference between MPEG and MP4, and get over why should we have to convert MPEG to MP4?
MPEG, the Moving Picture Experts Group, develops standards for digital video and digital audio compression. The MPEG standards are an evolving series (MPEG-1、MPEG-2、MPEG-4、MPEG-7 and MPEG-21), each designed for a different purpose.
MP4 is digital multimedia format most commonly used to store video, audio, subtitles and images. What's more, it allows streaming over the Internet.
MP4's biggest difference from MPEG formats is its ability to store subtitles, still images and other data along with digital video and audio.
MP4 supports more digital players, various video player programs and hardware devices, like iTunes, iPods, iPhones, iPads (all versions), the Media Player Classic, MPlayer, QuickTime Player, VLC media player, Windows Media Player 12, Microsoft Zune portable media player, XBMC Media Center, etc. What’ more, MP4 files are smaller in size than MPEG files, which can free up much space on your hard drive without declining the quality of your videos files.
So, convert MPEG to MP4 is a best choice, isn’t it?
Now you can keep reading this page to get the best MPEG to MP4 converter for Mac El Capitan.
Pavtube iMedia Converter for Mac is a professional MPEG to MP4 converter for Mac El Capitan. It can complete the task of converting MPEG to MP4 easily and efficiently. It is worth mentioning that Pavtube iMedia Converter for Mac can convert various video files, such as MOV, AVI, MP4, FLV, MKV, 3GP, MP3, FLAC, etc. Let you able to enjoy them on your Mac OS X El Capitan, as well as other portable devices such as iPhone, iPad, Apple TV, Android, Windows Phones, PSP, PS3, and so on. Meanwhile, you can also use it for some simple editing before conversion (splitting, trimming and combining, rotating and cropping, quality improvement, etc.). There will be no loss of image quality, and conversion itself is swift and effective.
Brief Introduction of Tutorial for MPEG to MP4 on Mac OS X E1 Capitan
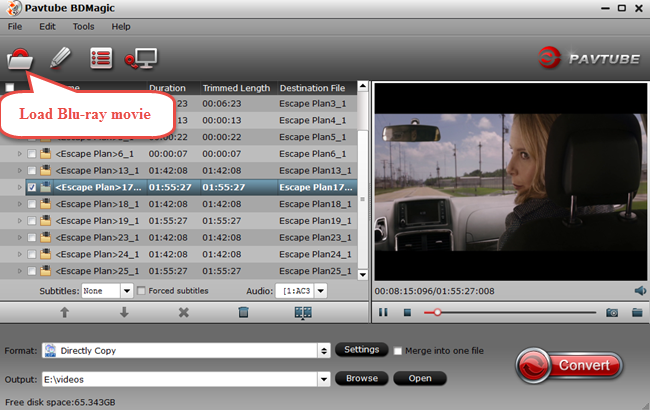
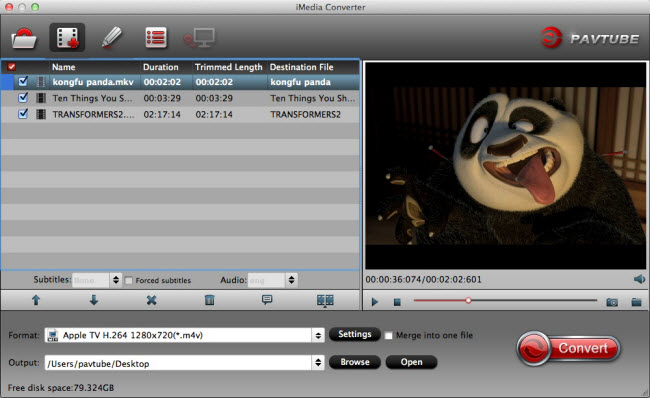
Step 1. Load Files.
Start up Pavtube iMedia Converter for Mac OS X E1 Capitan, Load MPEG files to the software using any of the three ways below:
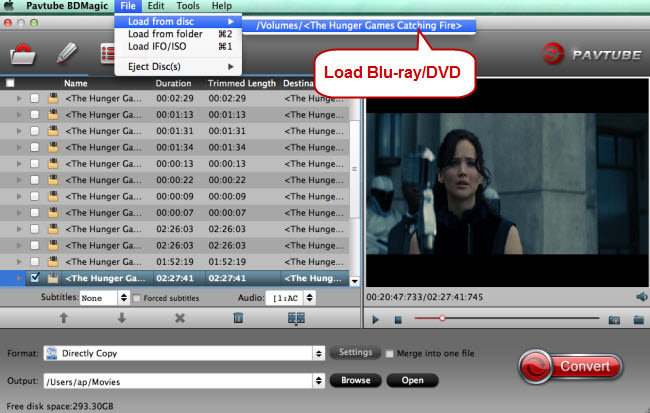
A. Click “File” menu, and select “Load IFO/ISO”, “Load from folder”, “Load from disc”, "Add Video/Audio" or "Add from folder" to import source files.
B. Click “Load file(s)” button or “Add video" button to import source files
C. Open the folder that contains source files, and drag and drop video, audio and image files to the program.
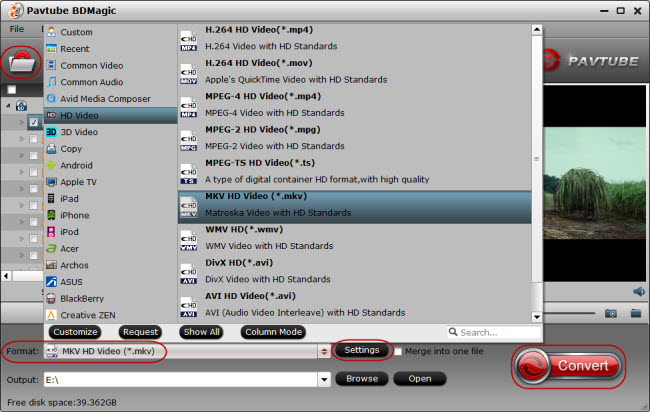
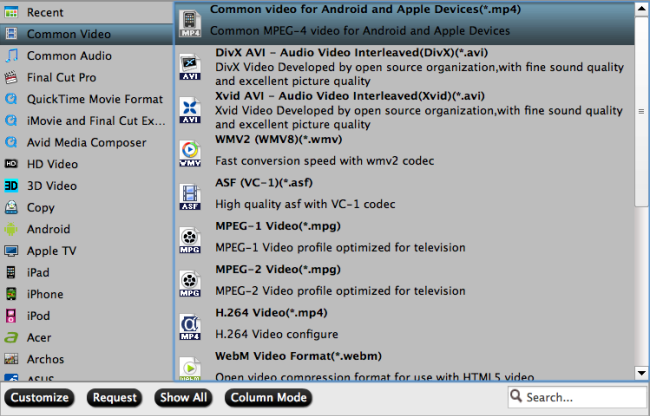
Step 2. Set Output Format.
Clicking the Format bar, you can choose output format from the format list or customize which formats to be shown on the list. Here we choose MP4 as the target format by click "common video" > " common video for android and apple device(*.mp4)".
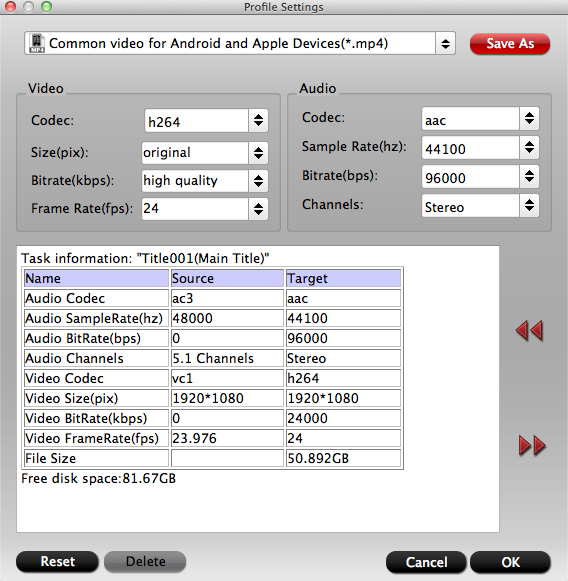
Step 3. Set Profiles.
All formats here are set with optimized video/audio codecs, bitrates, frame rates, etc. But you can still specify as you like by clicking Settings button.
In the Profile Settings window, you can choose or specify exactly the parameters you like. And in the Task information section, you can compare the detailed information of the source video and the target video.
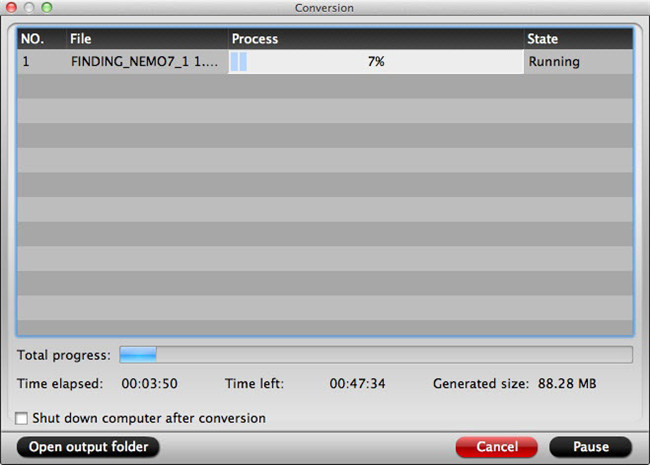
Step 4. Start Conversion.
Clicking the Convert button on main interface, you can go to Conversion window to start conversion. After conversion you can hit the "open" icon on the main interface to get the converted MPEG video and can transfer to the portable devices or importing iMovie for editing.
Note: If you are looking for a more cost-effective video converter for Mac OS X E1 Capitan, Pavtube Video Converter for Mac and Pavtube HD Video Converter for Mac may be suitable for you. It can also handle this task easily and efficiently.
Read More:
Hot Search: HandBrake Alternative for Mac | AnyDVD for Mac alternative | MakeMKV Alternative for Mac | FFmpeg Alternative | DVDFab Alternative for Mac
As a Mac user, you might need to convert MPG to MP4 on Mac (El Capitan, Yosemite, Mavericks, Mountain Lion, Lion and Snow Leopard included), because MP4 is the video format which is widely supported by Apple devices and iMovie.
Let’s figure out what the difference between MPEG and MP4, and get over why should we have to convert MPEG to MP4?
MPEG, the Moving Picture Experts Group, develops standards for digital video and digital audio compression. The MPEG standards are an evolving series (MPEG-1、MPEG-2、MPEG-4、MPEG-7 and MPEG-21), each designed for a different purpose.
MP4 is digital multimedia format most commonly used to store video, audio, subtitles and images. What's more, it allows streaming over the Internet.
MP4's biggest difference from MPEG formats is its ability to store subtitles, still images and other data along with digital video and audio.
MP4 supports more digital players, various video player programs and hardware devices, like iTunes, iPods, iPhones, iPads (all versions), the Media Player Classic, MPlayer, QuickTime Player, VLC media player, Windows Media Player 12, Microsoft Zune portable media player, XBMC Media Center, etc. What’ more, MP4 files are smaller in size than MPEG files, which can free up much space on your hard drive without declining the quality of your videos files.
So, convert MPEG to MP4 is a best choice, isn’t it?
Now you can keep reading this page to get the best MPEG to MP4 converter for Mac El Capitan.
Pavtube iMedia Converter for Mac is a professional MPEG to MP4 converter for Mac El Capitan. It can complete the task of converting MPEG to MP4 easily and efficiently. It is worth mentioning that Pavtube iMedia Converter for Mac can convert various video files, such as MOV, AVI, MP4, FLV, MKV, 3GP, MP3, FLAC, etc. Let you able to enjoy them on your Mac OS X El Capitan, as well as other portable devices such as iPhone, iPad, Apple TV, Android, Windows Phones, PSP, PS3, and so on. Meanwhile, you can also use it for some simple editing before conversion (splitting, trimming and combining, rotating and cropping, quality improvement, etc.). There will be no loss of image quality, and conversion itself is swift and effective.
Brief Introduction of Tutorial for MPEG to MP4 on Mac OS X E1 Capitan
Step 1. Load Files.
Start up Pavtube iMedia Converter for Mac OS X E1 Capitan, Load MPEG files to the software using any of the three ways below:
A. Click “File” menu, and select “Load IFO/ISO”, “Load from folder”, “Load from disc”, "Add Video/Audio" or "Add from folder" to import source files.
B. Click “Load file(s)” button or “Add video" button to import source files
C. Open the folder that contains source files, and drag and drop video, audio and image files to the program.
Step 2. Set Output Format.
Clicking the Format bar, you can choose output format from the format list or customize which formats to be shown on the list. Here we choose MP4 as the target format by click "common video" > " common video for android and apple device(*.mp4)".
Step 3. Set Profiles.
All formats here are set with optimized video/audio codecs, bitrates, frame rates, etc. But you can still specify as you like by clicking Settings button.
In the Profile Settings window, you can choose or specify exactly the parameters you like. And in the Task information section, you can compare the detailed information of the source video and the target video.
Step 4. Start Conversion.
Clicking the Convert button on main interface, you can go to Conversion window to start conversion. After conversion you can hit the "open" icon on the main interface to get the converted MPEG video and can transfer to the portable devices or importing iMovie for editing.
Note: If you are looking for a more cost-effective video converter for Mac OS X E1 Capitan, Pavtube Video Converter for Mac and Pavtube HD Video Converter for Mac may be suitable for you. It can also handle this task easily and efficiently.
Read More:
- Play 3D Blu-ray on iPhone 6 Plus Via Air VR on Mac OS X El Capitan
- How to Stream ISO Files to Apple TV 4 on Mac OS X El Capitan via AirPlay or iTunes
- Top 4 Best Video Converter for Mac OS X El Capitan Review
- El Capitan Review: Best Video Converter for Mac OS X El Capitan
- How to Watch Any Video with Best Format Factory for Mac OS X El Capitan Alternative