With the hot wave of Apple’s release of iOS 8 and the latest release of OS X Yosemite, here we may teach you how to correctly install it on your Mac.
With the latest iPhone and iPad released by Apple company, all the Apple fans are fond of the new devices. Hot on the heels if iOS 8 and a couple of new iPhones comes Apple’s latest release of OS X 10.10, codename “Yosemite”. However, how much do you know about the OS X Yosemite?
According to the announcement by Apple, this new system is free, comes with a brand new look, and is packed with features and security improvements over its predecessor, Mavericks. Here’s how to install it right now, as well as a look at the latest changes in Cupertino’s hardware line-up. Here maybe you can know more.
What noticeable changes you can see in the OS X Yosemite?
Comparing to the Apple’s iOS 7, it contains a brand new look that more closely resembles the bleeding transparency seen in former. Continuity, which allows you to seamlessly switch from mobile to desktop use; and iCloud Drive, which is a long overdue way of managing the cloud data you have stored with Apple.
OS X Yosemite is compatible with the following ones:
How to download it & save the installer?
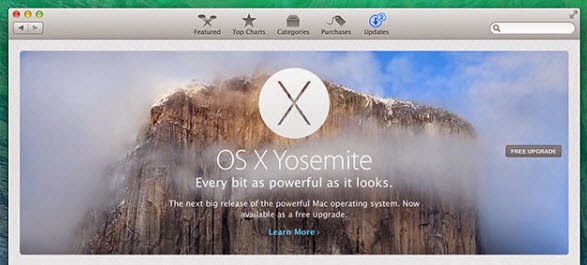
The free update can be found in the Mac App Store, simply launch it on your Mac and head to the Updates tab. Hit Free Upgrade, enter your Apple ID password, and Yosemite will download its installer to your Applications folder. When the download is complete, the installer will automatically launch, but you can close (or ignore) it.

Tip: If you have multiple Mac computers in your household, you will probably want to make a copy of the installer. You can do this by holding the option (also known as alt) key and dragging “Install Yosemite” from the Applications folder to another location so you can install it on your other computers without having to download it all over again.
Installing Yosemite?
You should back up your Mac with Time Machine before you perform any major upgrades, just in case. Once downloaded, you can install OS X Yosemite by running the “Install Yosemite” application, which will delete itself on completion. The whole process takes somewhere around 20 minutes, and when your Mac restarts, you’ll be able to start setting up Yosemite.
Something you should do next:
When you are be able to agree to some updated terms and conditions and begin using OS X Yosemite. Check out the new look and feel and the just follow the options.

Additionally, If you have an iPhone running iOS 8, you’ll now be able to take phone calls on your Mac or respond to text messages from any of your contacts using your keyboard.Don’t forget to check out the full list of changes in OS X Yosemite, and catch the full iOS 8 low-down too if you’re iPhone- or iPad-inclined.
How to transfer files from iTunes to iPhone? You may check it out here! So what are you waiting for? Just upgrade the OS X Yosemite and enjoy the fun!
With the latest iPhone and iPad released by Apple company, all the Apple fans are fond of the new devices. Hot on the heels if iOS 8 and a couple of new iPhones comes Apple’s latest release of OS X 10.10, codename “Yosemite”. However, how much do you know about the OS X Yosemite?
According to the announcement by Apple, this new system is free, comes with a brand new look, and is packed with features and security improvements over its predecessor, Mavericks. Here’s how to install it right now, as well as a look at the latest changes in Cupertino’s hardware line-up. Here maybe you can know more.
What noticeable changes you can see in the OS X Yosemite?
Comparing to the Apple’s iOS 7, it contains a brand new look that more closely resembles the bleeding transparency seen in former. Continuity, which allows you to seamlessly switch from mobile to desktop use; and iCloud Drive, which is a long overdue way of managing the cloud data you have stored with Apple.
OS X Yosemite is compatible with the following ones:
- iMac (mid-2007 or later)
- MacBook (13-inch aluminium, late 2008; 13-inch, early 2009 or later)
- MacBook Pro (13-inch, mid 2009 or later; 15-inch, mid 2007 or later; 17-inch, late 2007 or later)
- MacBook Air (late 2008 or later)
- Mac Mini (early 2009 or later)
- Mac Pro (early 2008 or later)
How to download it & save the installer?
The free update can be found in the Mac App Store, simply launch it on your Mac and head to the Updates tab. Hit Free Upgrade, enter your Apple ID password, and Yosemite will download its installer to your Applications folder. When the download is complete, the installer will automatically launch, but you can close (or ignore) it.
Tip: If you have multiple Mac computers in your household, you will probably want to make a copy of the installer. You can do this by holding the option (also known as alt) key and dragging “Install Yosemite” from the Applications folder to another location so you can install it on your other computers without having to download it all over again.
Installing Yosemite?
You should back up your Mac with Time Machine before you perform any major upgrades, just in case. Once downloaded, you can install OS X Yosemite by running the “Install Yosemite” application, which will delete itself on completion. The whole process takes somewhere around 20 minutes, and when your Mac restarts, you’ll be able to start setting up Yosemite.
Something you should do next:
When you are be able to agree to some updated terms and conditions and begin using OS X Yosemite. Check out the new look and feel and the just follow the options.
Additionally, If you have an iPhone running iOS 8, you’ll now be able to take phone calls on your Mac or respond to text messages from any of your contacts using your keyboard.Don’t forget to check out the full list of changes in OS X Yosemite, and catch the full iOS 8 low-down too if you’re iPhone- or iPad-inclined.
How to transfer files from iTunes to iPhone? You may check it out here! So what are you waiting for? Just upgrade the OS X Yosemite and enjoy the fun!